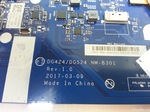
Buenas amigos. Problema resolvido.
Comprei um chip 25Q64FW e gravei com a BIOS que baixei do próprio site da Lenovo e a notebook voltou a vida, como esperado. Para isso tive que fazer um procedimento para extrair e editar o arquivo de dentro do executável de instalação, deu um pouco de trabalho mas na segunda tentativa funcionou. Vou postar em breve o arquivo já editado para caso alguém precise, e no final deste post vou colar as instruções que eu achei em um site gringo ensinando com faz o processo.
Agradeço a ajuda dos amigos, já vou distribuir o joinha para todos.
________________________________________________________________________________________________________________________________________
Procedimento para extrair BIOS Phoenix TDK de arquivo executável:
How to extract and edit a Lenovo Phoenix TDK Bios.
For this tutorial we`ll use a Phoenix bios update for lenovo AMD models: 320-15AST, 320-17AST, 320-14AST as an example how you can extract the bios and edit it to the correct size for bios programming.
The bios update needs extracting twice,using extraction software first then using the command line.
Extract the 5pcn20ww.exe using UniversalExtractor RC2 ,or innoextractor from github.
After you`ve extracted the first exe check if the 5PCN20WW.exe is a phoenix TDK bios by looking at the file details,right click on the exe - select properties then the details tab.
Next,make a new folder on your drive called TDK,then move or copy the 5PCN20WW.exe into that folder,then you need to use the command line,as admin, and change to the directory of the TDK folder.Press the enter/return key after each of the commands:
cd C:\TDK
Then run this command to extract the exe:
5PCN20WW.exe /ext
Now you should have a bunch of files inside the TDK folder including the bios (bios.cap) capsule.The capsule header needs removing but cannot be extracted using UEFITool,which is one of the popular methods to remove a capsule header from some bios vendors so it needs editing with a hex editor.
I use HxD,its free and the latest version includes a portable edition: https://mh-nexus.de/en/downloads.php?product=HxD20
Open the file bios.cap with HxD. Click on Edit - Select block or use Ctrl+E .The length of the header we need to remove in hex is 318 ,set the Start-offset at 0 and the End-offset at 317 and click on OK . Delete the selected part using Edit - delete ,or the Del/Delete key on your keyboard.
Next, select Edit - Select Block or Ctrl+E and set the Start-offset at 0 ,click on the Length button and enter 800000 (as the length), or choose the End-offset instead and set to 7FFFFF.
Next, select Cut or Copy. Make a new file using Ctrl+N or File - New ,then select Edit - paste insert or Ctrl+V to paste into the new file.
Select Save or Save as to save the new 8,192KB 8MB bios.
Just a sidenote: Some other phoenix bios headers need cutting from 0-1E7 (length 1E8),after selecting the bios/bios update length check the last hex line of your bios backup to make sure it matches.


.thumb.png.c2ccd9596e6e9061fa007d95a710efc8.png)